
Materials You’ll Need: Before you begin, gather these essential materials:
- One organic potato
- Sharp knife
- Toothpicks
- Glass or container
- Potting soil
- Larger container (e.g., grow bag or large pot)
- Sunlight
Step-by-Step Guide:
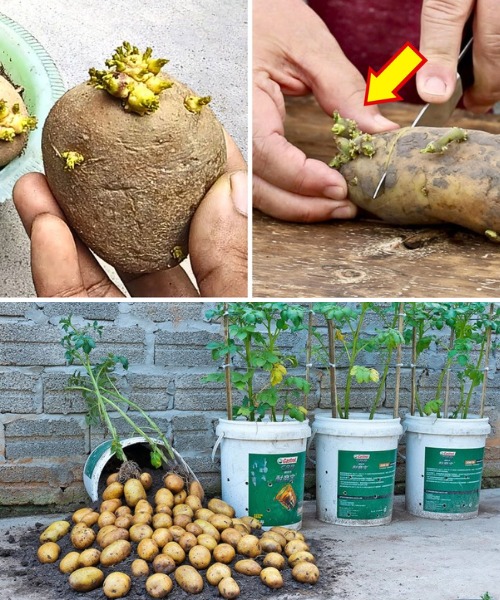
Step 1: Choose the Right Potato Select a healthy, organic potato for optimal results. Avoid using store-bought potatoes treated with growth inhibitors.
Step 2: Slice Your Potato Carefully slice the potato into pieces, ensuring each piece has at least one eye or sprout. Let the slices heal for a day or two.
Step 3: Preparing Your Water Setup Fill a glass or container with water and place toothpicks around each potato slice. Submerge the bottom portion of the slices in water.
Step 4: Submerge the Potato Slices Gently place the potato slices into the water, suspended by the toothpicks. Ensure only the bottom portion is submerged.
Step 5: Maintain and Monitor Growth Put the container in a sunny spot with indirect sunlight. Change the water every few days. Expect sprouts and roots to form within a few weeks.
Step 6: Transplanting to Containers Transfer the potato slices to larger containers once they have healthy sprouts and roots:
- Fill the container with potting soil.
- Plant each slice with sprouts facing upward and roots downward.
- Cover with soil, leaving sprouts exposed.
Step 7: Care and Maintenance Place the container in a sunny location with 6-8 hours of direct sunlight daily. Water regularly and apply balanced fertilizer as needed.
Step 8: Harvest Your Potatoes In a few months, harvest your homegrown potatoes once the plants flower.
Conclusion: Growing potatoes at home from just one potato is a simple and rewarding endeavor suitable for all skill levels. Whether you have limited space on a balcony or ample room in a garden, this method can be adapted to fit your needs. Enjoy the satisfaction of harvesting your fresh, homegrown potatoes and elevate your culinary creations. Happy gardening!
